S-5!
Satellite Dish Mounting Kit for AG Panel Residential Metal Roofs
Satellite Dish Mounting Kit for AG Panel Residential Metal Roofs
SKU:54002011
Everything you need to mount a Satellite Dish on an AG Panel residential exposed fastener metal roof IMPORTANT: If you are installing a Starlink dish, review the notes at the bottom of the description tab about Starlink base mounts before placing your order. SHIPPING INCLUDED to the Lower 48 US States.
Couldn't load pickup availability
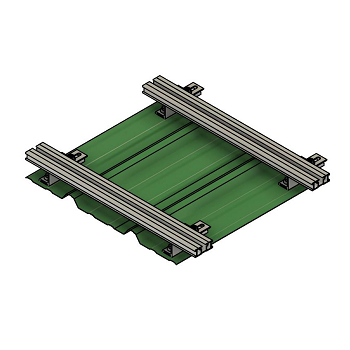
Our Satellite Mounting Dish Kit includes everything you need to install any standard* satellite dish on any AG panel (exposed fastener panel). This dish kit can be installed in 15-20 minutes with only basic hand tools.
How to determine if you have an AG Panel roof?
This is simple to determine using a tape measure. Simply measure the center to center distance of the major ribs. If it is 9″, you have an AG Panel roof.

If you are installing a satellite dish on a corrugated roof, or “R”, or “PBR” style roof, we recommend our Satellite Dish Kit for “R” Panel & Corrugated Roofs.
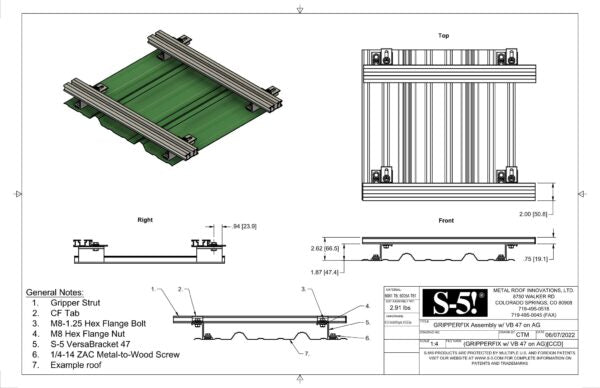
The Kit includes:
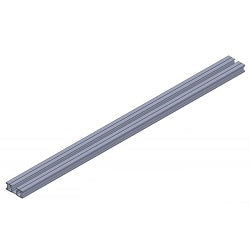
- 2 ea 26″ GripperFix Struts 54000140
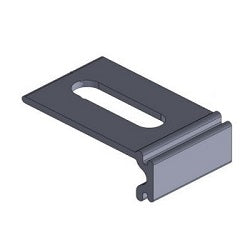
- 4 ea GripperFix CF Tab 54000138
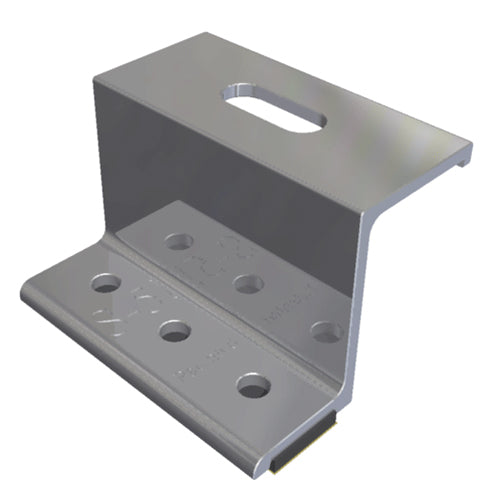
- 4 ea S-5 VersaBracket VB-47 54000077
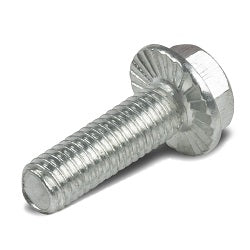
- 4 ea M8-1.25x17mm Flanged Bolts (Bolts the CF Tab to the Bracket)
- 4 ea M8-1.25x40mm Flanged Bolts (Inserts into the GripperFix Strut. Satellite dish is mounted to these bolts) 54000145
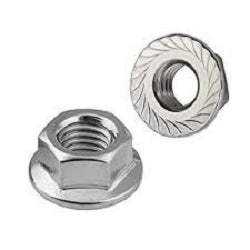
- 8 ea M8 Flanged Nuts 54000111
- 1 Bag (50pcs) 1/4-14×1.5″ Wood Screws w/ Stainless Steel Cap & EPDM Rubber Washer 54000121×50
Tools you will need for installation:
- Tape Measure
- Drill/Screw Gun (impact driver should not be used)
- 3/8″ Driver Bit for 1/4-14 screws
- 13mm socket wrench and 13mm open end/box wrench (or two of either)
Not required, but recommended (if you need to cut the GripperFix Strut):
- Hacksaw or Sawzall with 14tpi minimum metal cutting blade
IMPORTANT NOTES ON STARLINK INSTALLATIONS:
- Starlink has a variety of base mount options available, many of which may not work with this kit. In particular, the standard four point mount may or may not have holes large enough to accommodate the 8mm diameter bolts supplied with our kits, there may not be enough material around the holes to drill out to 5/16″ [8mm].
- We recommend the “Pivot” or “Volcano” mounts. Note that you may need to enlarge the mounting holes on the mount base with a 5/16″ drill bit if they are not large enough for the M8x40mm bolts we supply with the kit. Please consult your Starlink documentation or contact Starlink customer service to determine which of these two options is best for your specific roof application.
- Some older Starlink satellite dishes have a base that may require a longer bolt than we can supply to mount the dish (Our bolt is 1-9/16″ [40mm]). If you have one of these dishes, you will have to source longer bolts locally. We suggest preassembling your dish to one of the GripperFix rails to determine how much longer your fastener needs to be.
 |
 |
 |
|---|---|---|
| Standard Starlink Base (Note 1) | Volcano Starlink Base (Note 2) | Pivot Starlink Base (Note 2) |
*Starlink is a registered trademark of Space Exploration Technologies Corp (SPACEX)